
Print the profile-extents-test-image.jpg image using the media/profile setting that you want to evaluate.
In the dark side of the step tablet locate the black step where there is the first change from the full black stripe.
The low aim point will be the adjacent darker step.
Often profiles bottom out at 15-20. An image targeted at a low aim point of 0 will be crushing 15 points of shadow detail.
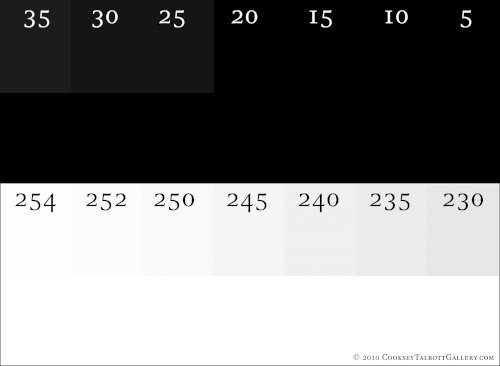
In the light side locate the step where there is no difference. The high aim point, Zone VIII is the adjacent darker step. I like to be laying down ink on Zone VIII and not on Zone IX values. This is usually the difference between 253 and 255. I will try to have a few twinkles of Zone IX that is pure paper white.
Armed with these two numbers images can be more precisely targeted to a material and profile.
Targeting the Image
Use the threshold layer to target the image.
Add a Threshold layer over a Levels layer on top of the stack of layers.
- Set the Threshold level to the low aim point value, the image will be mostly white.
Adjust the low output of the levels layer until there are a few spots of black on the white field. These regions will be full black. - Set the Threshold level to the high aim point value then adjust the hi slider down until a few spots of white appear on the black field. On a high resolution image it is wise to zoom in some and check. Hi aim point targeting will not work if there is no white value in the image however usually there is a white value or one that can be promoted to white.